How to Make a Bar of Soap in Seven Simple Steps
With just a handful of ingredients, it’s possible to make stunningly beautiful, skin softening, amazingly moisturising soap in bars, liquid and cream.
Soap making uses similar equipment to cooking and whilst you may want to use your everyday saucepans and utensils, I strongly advise buying a set that you keep exclusively for soap making.
You can make soap on any type of hob – gas, electric, induction or aga –in a stainless steel saucepan.
The equipment you will need includes:
Saucepan
If you plan to make soap on the hob then you will need a heatproof container, such as a saucepan. The saucepan must be made of stainless steel to avoid any unwanted reaction with the lye.
Spoons
You will need a collection of stainless steel teaspoons, dessert spoons and serving spoons for stirring and dispensing ingredients.
Spatula
Use a long handled spatula for scraping any soap residue from the sides of the pan and jugs. Silicone spatulas are particularly flexible and can withstand the heat of the soap mixture.
Jugs and bowls
You will need a heatproof jug or bowl in which to mix and rest your lye solution. Whilst these can be made of thick plastic, they will deteriorate after many months of soap making so heatproof glass is better.
Digital scales
A set of digital scales is essential for accurate measuring of your ingredients. Never guess the weight as the recipe can go wrong and the soap can be potentially dangerous if the measurements are not precise.
A handheld stick blender
This is such a useful piece of equipment – every soap maker should have one in his or her toolbox! Whilst it is possible to make soap without a handheld stick blender, it will save hours of stirring if you use one.
Moulds (with or without mould liner and something to fix the liner in place)
Once your soap is ready it will need to be poured into your chosen moulds. Some moulds may require lining to make it easier to remove the finished soap, in which case you may need pegs or tape to hold the liner in place. You can use household items like juice or milk cartons, shoe boxes, plastic ice cream times and muffin cases as a soap mould.
Old towels and blankets
If you are using the cold-process method, your soap will need to be insulated during the first 24 hours. To do so effectively, cover your soap with layers of blankets or towels.
Protective clothing
Although you don’t need full overalls, at the very least you will need safety glasses, protective gloves and an apron. These will protect your skin, eyes and clothing from any unwanted caustic splashes.
Kitchen paper towels, cloths and hot water
Soap making can be very messy! Keep a roll of kitchen paper towels or cloths to hand to wipe up any spillages.
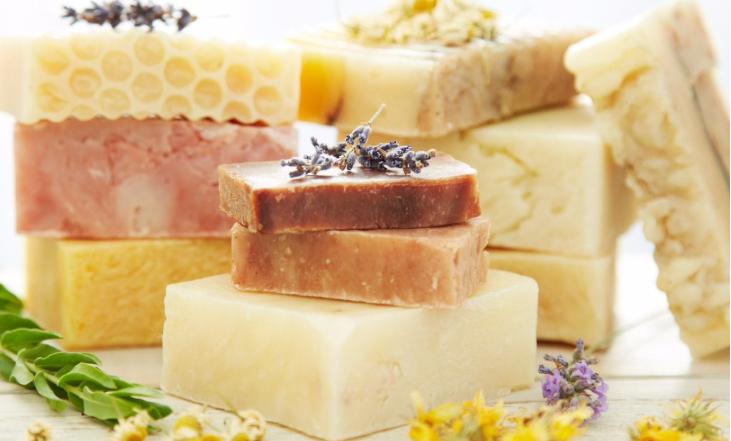
Choosing your soap-making ingredients
You can use as little as three ingredients to make soap – water, sodium hydroxide and a fat. Whilst you have a choice of fats, there is no substitute for sodium hydroxide if you wish to make ‘real’ soap as this causes the chemical reaction that eventually converts the fats into soap.
Soap making ingredients – sodium and potassium hydroxide
Authentic, natural soap, both hard bar and liquid soap, is made from the chemical reaction of lye combined with fats. The lye is made from water (or water combined with other liquids) and an alkali. For hard bars of soap the alkali is sodium hydroxide, for liquid soaps the alkali is potassium hydroxide.
Safety advice for handling lye
Sodium and potassium hydroxides are corrosive and potentially dangerous if not handled correctly. Whilst this may put many potential soap makers off, the process of making soap need not be dangerous if appropriate care is taken.
I liken the method of making up lye to watching a 12-year-old child pour boiling water from a kettle into a cup. Whilst you might be nervous, you know that no harm should come to the child if the entire process is done properly and with due care and attention.
Safety equipment required when mixing sodium or potassium lye
It is absolutely essential that you wear protective gloves when handling lye. Household rubber gloves will suffice, but if you prefer something thinner and yet still as protective, nitrile gloves can be worn. Nitrile gloves are more resistant to chemical splashes than rubber gloves.
Make sure that your arms are covered when dealing with lye. As a sensible precaution, wear shoes, not sandals to prevent any splashes landing on your bare feet.
Since the lye may splash we strongly advise that you wear a pair of safety glasses. These are designed so that you can wear them over your normal spectacles, if necessary.
To prevent the lye splashing on your clothing, wear a protective apron.
If you feel that the fumes may be unpleasant for you, wear a protective mask to prevent breathing them in and make sure that you always work in a well-ventilated room.
As well as my recommendations, read and follow the safety guidelines on the sodium and potassium hydroxide containers. Soap making is not dangerous if you handle the sodium, potassium and other lye-associated ingredients correctly and sensibly.
How to make your own soap
- Weigh out the water required for a lye solution. Place the water jug to one side whilst you weigh your sodium hydroxide, making sure to stick to all the safety instructions given (these can be found in the “handling sodium hydroxide” section of Sally’s book on page 9).
- Carefully tip the sodium hydroxide into the water and stir until there is no gritty feeling at the bottom of the jug. This indicates that all the sodium hydroxide has dissolved.
- Weigh the oils, butters and waxes you want to use and transfer to a saucepan. Place on the heat until the solid oils, butters and waxes have melted. Do not include the essential or fragrance oils in this saucepan yet.
- Wearing your safety goggles and gloves, and paying extremely careful attention to the safe handling of the lye, pour a very small amount of lye into the melted oils. If there is no reaction, such as the oils trying to fizz and react to the lye, carry on carefully pouring it into the melted oils.
- Stir the oils and lye together with a handheld stick blender until they form a light trace. Blitz the soap mixture for 2-3 minutes with the blender until it reaches trace (trace is when the soap mixture looks like pancake batter or custard). When you drizzle a little of the soap batter back into the mixture, it will briefly sit on the surface before sinking into the rest of the batter. Light trace is when your mixture is still runny, medium trace is slightly thicker sap batter and heavy trace is very thick soap mixture that will dollop, rather than pour smoothly when you tip it out.
- Unless specified in the recipes, add the essential or fragrance oil to the lightly traced soap batter and stir well, right down to the bottom of the saucepan, so the oils are incorporated well. If you are adding colour, it is likely this will be added at this step. Stir well after each addition.
- Pour the soap mixture into the prepared mould and cover with old towels if the mould does not have a lid. The soap needs to be kept insulated for 24 hours. Clear up, wash up and wait!
- For fun, colourful soap recipe ideas, read How to Make Your Own Soap in Bars, Liquid and Cream by Sally Hornsey.
-
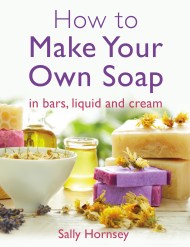
How To Make Your Own Soap
by Sally Hornsey
This book will guide you through creating your own liquid and bar soap. Design and create bars of soap using traditional methods that incorporate moisturising oils and butters, and make fun and funky glycerine soaps that look almost too fabulous to use.
If you prefer liquid soaps then this book also explains how to create liquid and cream soaps from scratch as well as how to design body washes using many of the easily obtainable surfactants.
In this book you will discover how to:
· Choose soap making ingredients that will be most beneficial for your skin type
· Design and create a range of soapy products including hand and body washes
· Scent your soaps using essential and fragrance oils
· Make glycerine melt and pour soap from scratch
· Understand different soap making methods and techniques